
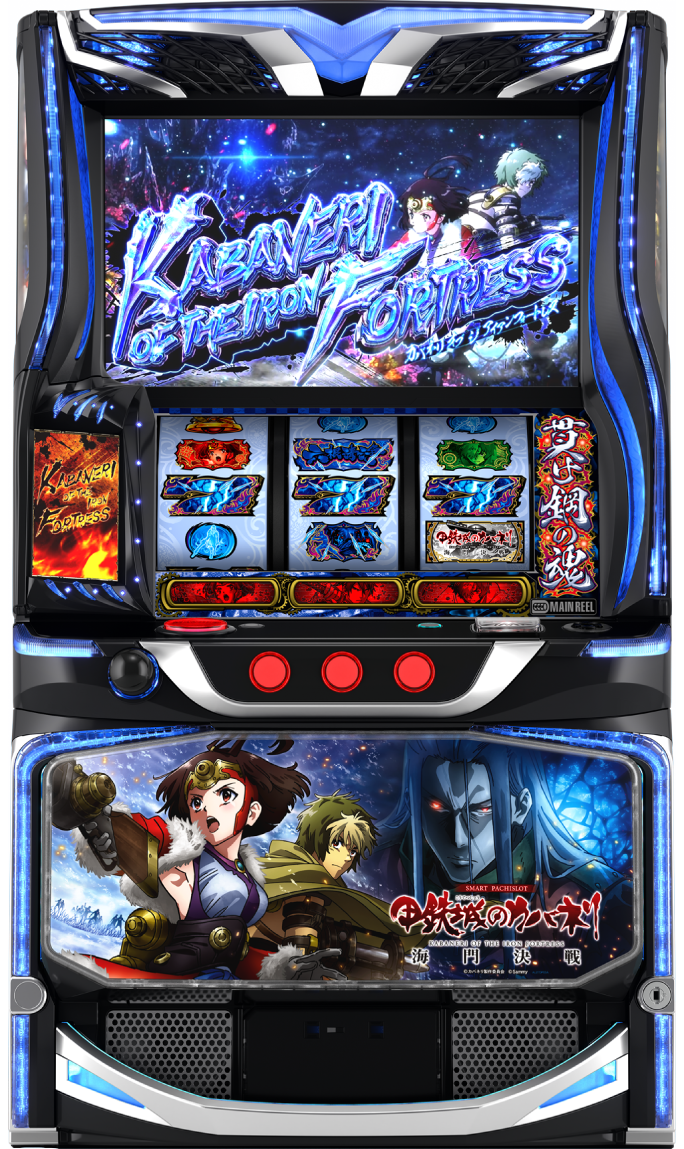
| Model Name | L 甲鉄城のカバネリ 海門決戦 XX |
|---|---|
| Certification No. | 5S1358 |
| Net gain per game | ~6.0 coins |
| Official Site | https://kabaneri.com/ |
|---|---|
| Official social media | https://x.com/anime_kabaneri |
| Wikipedia | https://ja.wikipedia.org/wiki/甲鉄城のカバネリ |
Effects
Effect Rules (Normal Play)
A character-art stage change may occur, and when it does, it hints at the required points.
| Stage Change Effect Rules | |
| Effects | Rule |
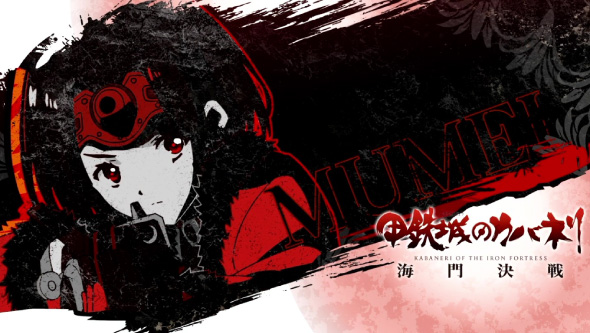 Mumei Mumei |
Hint that the required Mumei points are close |
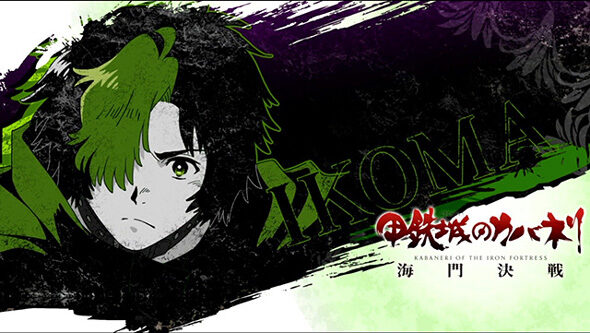 Ikoma |
Hint that the required Ikoma points are close |
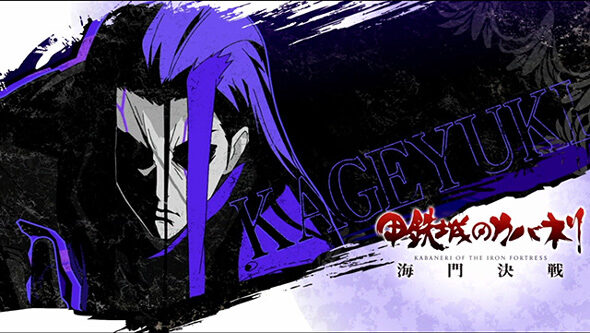 Kageyuki |
Hint that the required Kabane points are close |
[Conversation Effect]![Smart Pachislot Kabaneri of the Iron Fortress: Battle of Unato [Conversation Effect]](https://hazuse.com/wp/wp-content/uploads/2026/02/5S1358-801e9c92fa.jpg)
The conversation content may hint at the required points.
Also, if certain effects appear in Mumei and Ikoma conversation effects, they hint at the required points.
| Conversation Effect Rules | |
| Effects | Rule |
| Red text (Mumei) | Hint that the required Mumei points are close |
| Red text (Mumei) + reply | Strong hint that the required Mumei points are close |
| Green text (Ikoma) | Hint that the required Ikoma points are close |
| Green text (Ikoma) + reply | Strong hint that the required Ikoma points are close |
| Blue text (Helmsman) | Hint that the required Kabane points are close |
| Blue text (Helmsman) + reply | Strong hint that the required Kabane points are close |
| Conversation Effect Rules | |
| Effects | Rule |
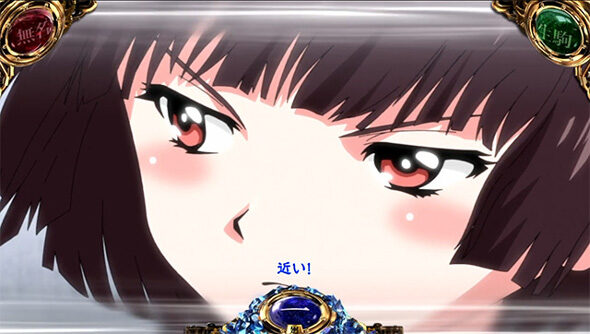 Mumei: “Close!” |
Hint that the required Mumei points are close |
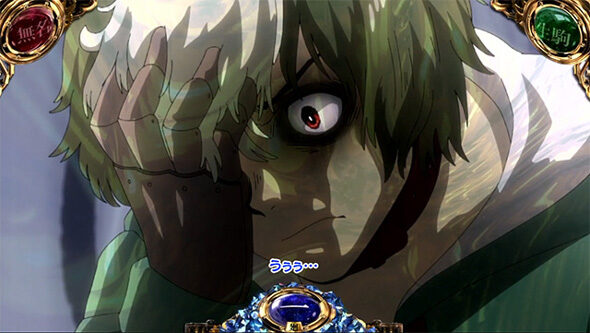 Ikoma: “Ugh…” |
Hint that the required Ikoma points are close |
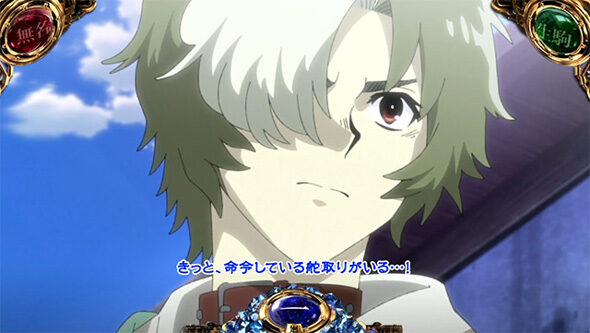 Ikoma: “There must be a helmsman giving orders…!” |
Hint that the required Kabane points are close |
[Mini-Character Effect]![Smart Pachislot Kabaneri of the Iron Fortress: Battle of Unato [Mini-Character Effect]](https://hazuse.com/wp/wp-content/uploads/2026/02/5S1358-de5a88e22a.jpg)
Mini-character lines may hint at the required points.
| Mini-Character Effect Rules | |
| Effects | Rule |
| Leaves without saying anything | More likely to appear the closer the appearing character is to the required points |
| Hehe… | |
| Almost there | Hint that the appearing character is close to the required points |
| It’s close | Strong hint that the appearing character is close to the required points |
[Reel Flash]
If an unusual reel flash occurs when Replay or Bell aligns, it hints that the required Mumei or Ikoma points are close.
If it occurs during a CZ precursor, the actual CZ precursor is highly likely.
Also, if a V-flash occurs during a cycle precursor, a Bonus is highly likely.
[Effects During a Precursor]
| Effect Rules During a Precursor | |
| Effects | Rule |
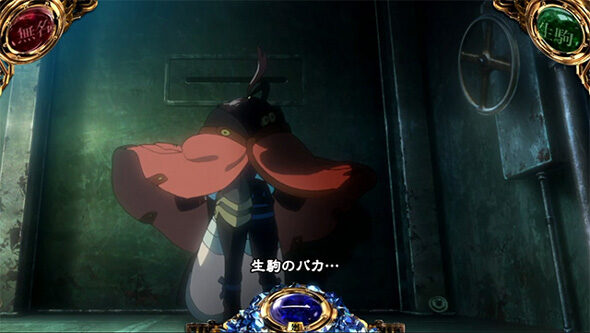 Depressed Mumei Effect |
Corresponds to Replay or Chance pattern If contradicted, the Hit likelihood increases |
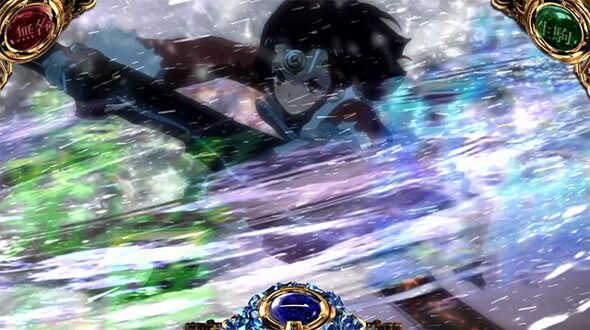 Roulette Effect |
Corresponds to Chance pattern If contradicted, the Hit likelihood increases |
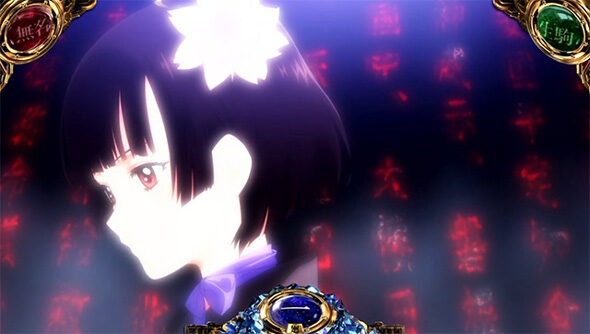 Text Effect |
|
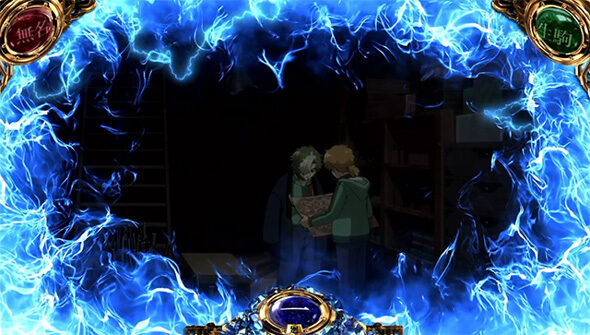 Frame Effect |
Blue effect increases the Hit likelihood Black effect gives Very high expectation |
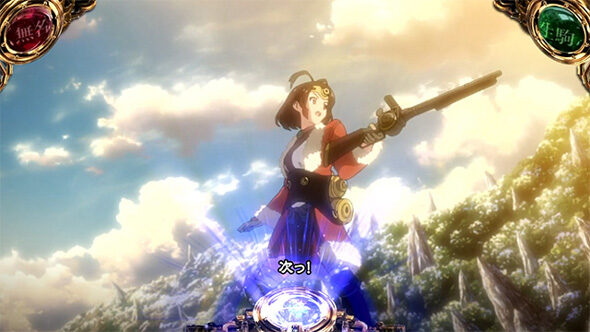 Kabane Defeat Effect |
Corresponds to Bell If contradicted, the Hit likelihood increases |
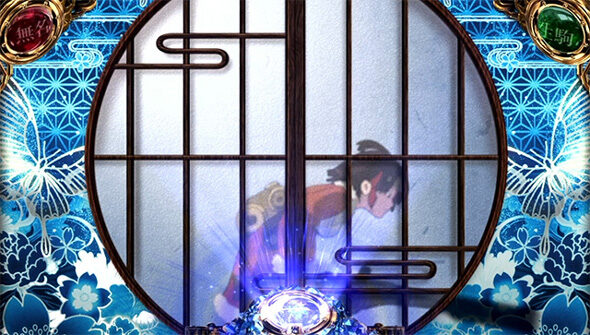 Shoji Effect |
The later Mumei passes by, the more the Hit likelihood increases If a Kabane passes by instead of Mumei, Very high expectation |
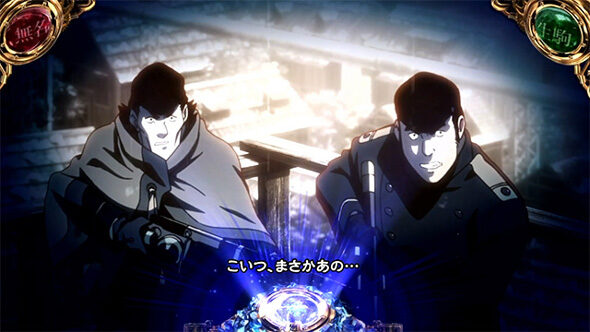 I Am Kabaneri Effect |
If it occurs before moving to “Kabane Final Defense Zone,” expectations are high; if it moves to “Kabane Final Defense Zone” after failure, the EPISODE BONUS Hit likelihood greatly increases |
| If it occurs during “Kabane Final Defense Zone,” Very high expectation + the EPISODE BONUS Hit likelihood greatly increases | |
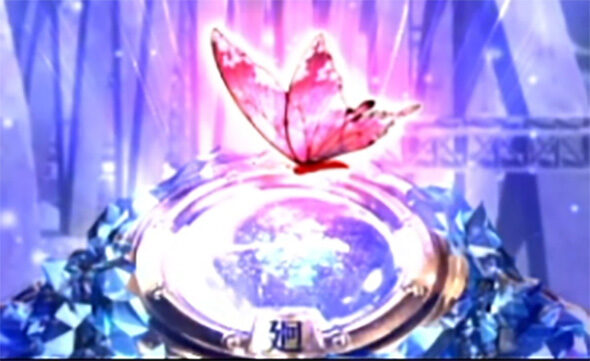 Butterfly Flight Effect |
If a blue butterfly lands on the cycle icon, Very high expectation If a red butterfly lands, Very high expectation + the EPISODE BONUS Hit likelihood greatly increases |
| If the red butterfly passes without landing, EPISODE BONUS is highly likely | |
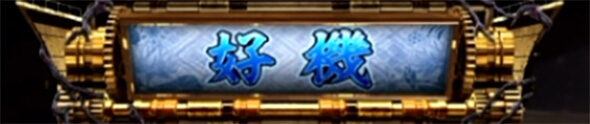 UI Roulette Effect |
Sign: the more it appears, the higher the expectation; Sign + Chance pattern gives Very high expectation Opportunity: if Opportunity + Chance pattern denied, Very high expectation Extremely hot: Hit likelihood greatly increases + Very high expectation for EPISODE BONUS |
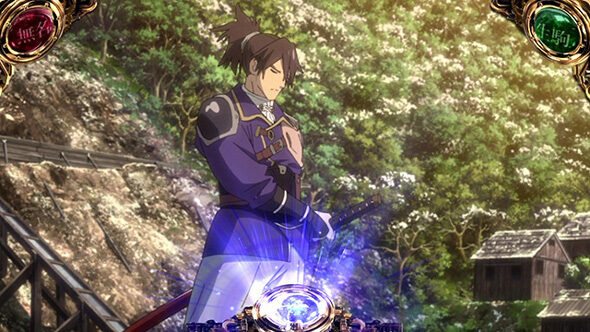 Kurusu appears |
Hit likelihood increases as soon as it occurs |
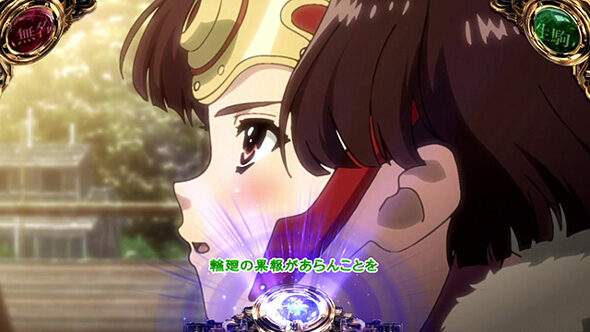 Mumei Line Effect (green text or higher) |
|
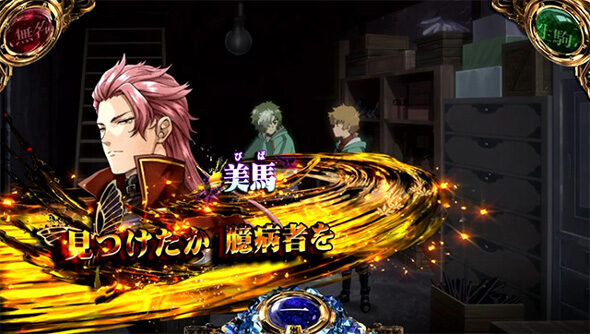 Conversation Effect |
Gold text greatly increases the EPISODE BONUS Hit likelihood |
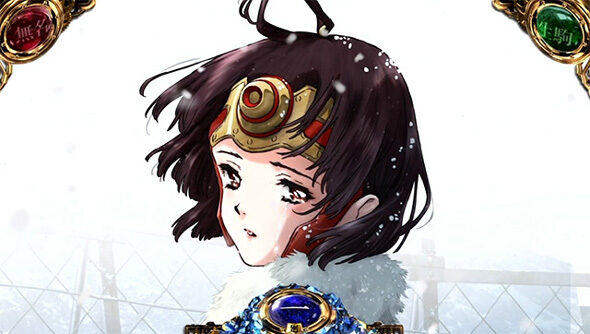 Next-episode preview |
The EPISODE BONUS Hit likelihood greatly increases as soon as it occurs |
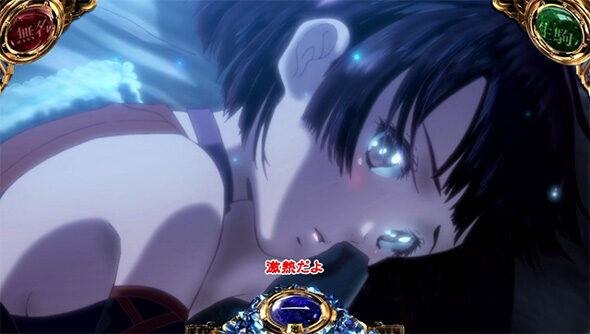 “Extremely hot” notice |
|
[Effects During a CZ Precursor]
| Effect Rules During a CZ Precursor | |
| Effects | Rule |
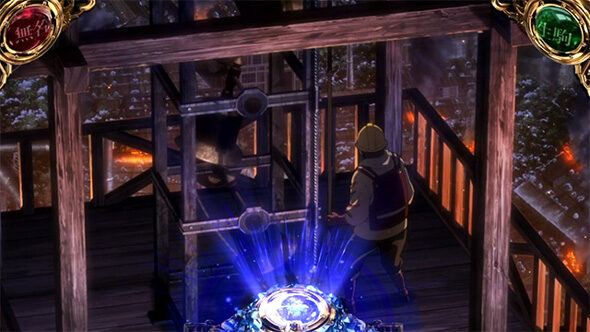 Suzunari Effect |
Corresponds to Bell If contradicted, the Hit likelihood increases |
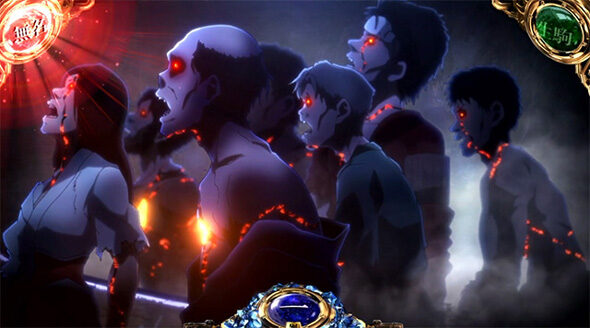 Kabane Passing Effect |
The more Kabane pass by, the more the Hit likelihood increases If a Kabane stops and attacks, Very high expectation |
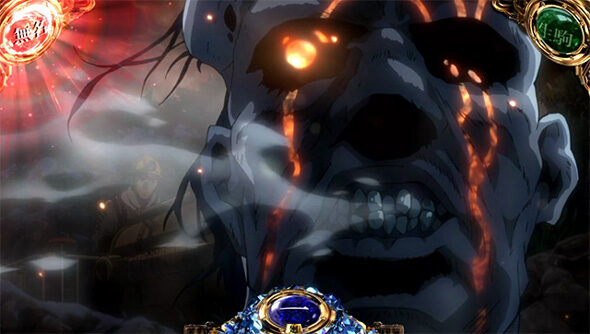 Kabane Face Close-up Effect |
The more it occurs, the more the Hit likelihood increases |
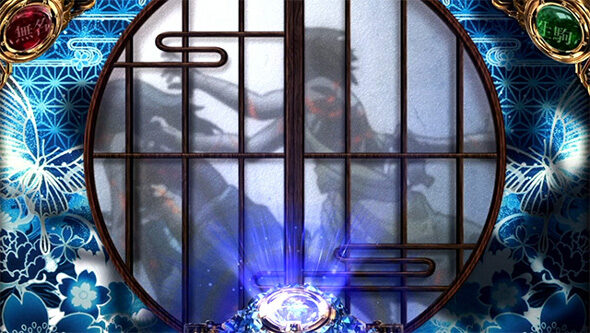 Shoji Effect |
The more Kabane pass by, the more the Hit likelihood increases If Mumei passes by instead of a Kabane, Very high expectation |
Butterfly Flight Effect |
If a butterfly lands on the Mumei/Ikoma icon, Very high expectation If a butterfly flies to the Ikoma icon during the Mumei CZ precursor, the Douan CZ Hit likelihood greatly increases |
UI Roulette Effect |
Sign: the more it appears, the higher the expectation; Sign + Chance pattern gives Very high expectation Opportunity: if Opportunity + Chance pattern denied, Very high expectation Extremely hot: Hit likelihood greatly increases + Very high expectation for Douan CZ |
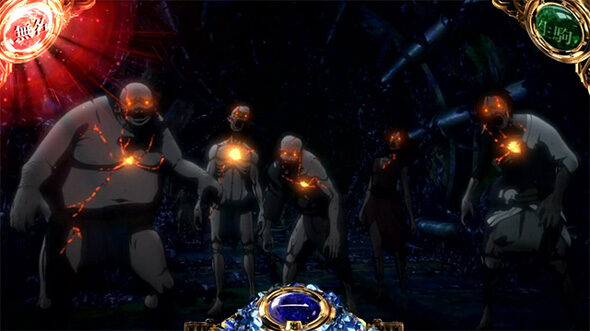
Mumei CZ Notification Effect
|
If a Kabane appears from the tunnel door, Mumei CZ is highly likely |
| If it occurs during the Ikoma CZ precursor, Very high expectation for Douan CZ | |
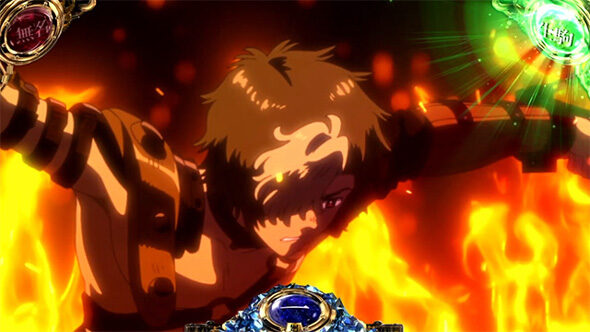 Ikoma CZ Notification Effect |
If Ikoma breaks the chains, Ikoma CZ is highly likely |
| If it occurs during the Mumei CZ precursor, Very high expectation for Douan CZ | |
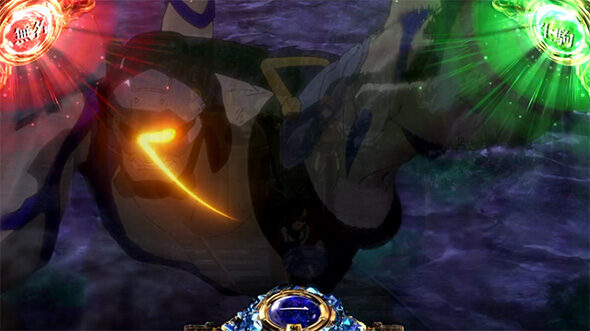 Douan Teaser Effect |
If Douan appears, Douan CZ is highly likely |
*According to HAZUSE research.
Effect Rules (During ST)
The corresponding winning combinations for each effect outside a precursor are as follows.
These rules apply when aiming for the sandwiched pattern [Blue 7 / Replay / Blue 7] on the left reel.
| Corresponding Winning Combinations by Effect | |
| Effects | Corresponding winning combination |
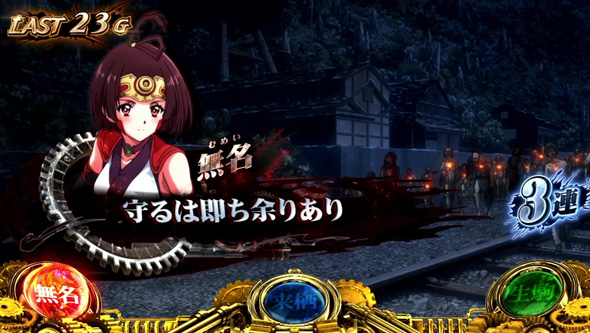 ST Conversation Effect |
blank or Chance pattern |
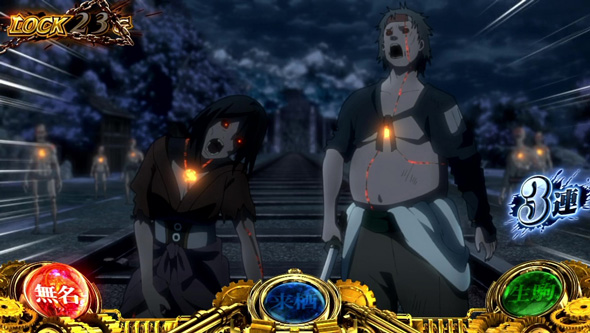 Kabane Navi Effect |
Rising-right Replay or Chance pattern |
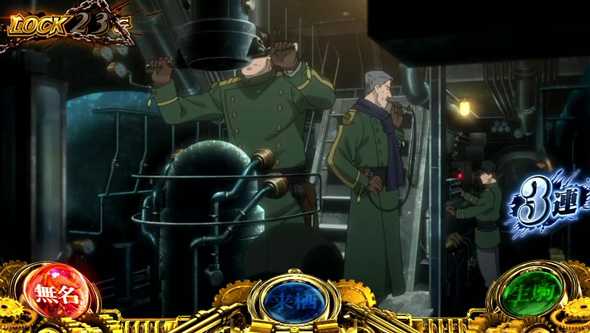 Battle Situation Effect |
Middle-row replay or Chance pattern |
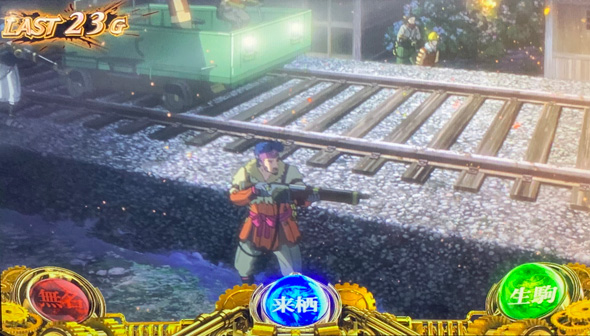 Gunfire Effect |
Rising-right Bell or Chance pattern |
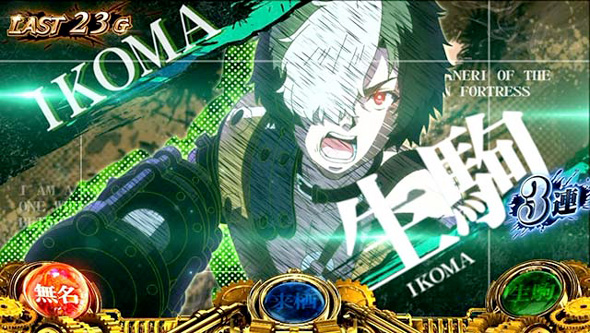 Character Step-up Effect |
Bottom-row Bell or Chance pattern |
| Chance Pattern Hit Likelihood by Effect | |
| Effects | Hit likelihood |
| ST Conversation Effect | 10% |
| Kabane Navi Effect | 20% |
| Battle Situation Effect | 45% |
| Gunfire Effect | 10% |
| Character Step-up Effect | 50% |
| Notable Effect Rules | |
| Effects | Rule |
| When the Lever is turned on / red line | Chance pattern is highly likely If it is a single Chance pattern, Bonus is highly likely |
| Kabane Navi Effect with a female Kabane on the left | Chance pattern is highly likely |
| Character Step-up Effect / Step 2 Mumei | |
| Character Step-up Effect / Step 3 Kurusu | Composite Chance pattern or All-Star Pattern is highly likely |
| Corresponding Winning Combinations by Meter Step-up Effect | |
| Step count | Corresponding winning combination |
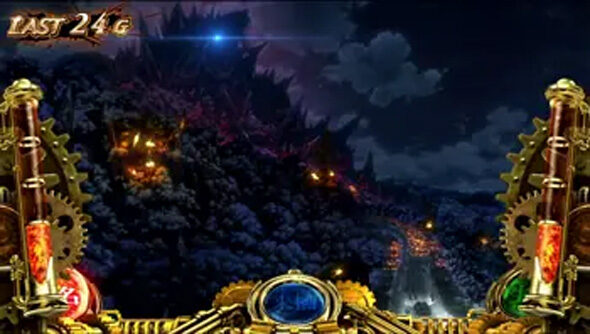 Step 1 |
minor symbol or better |
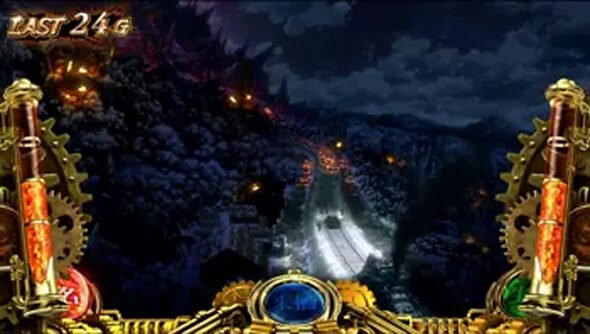 Step 2 |
Chance pattern is highly likely |
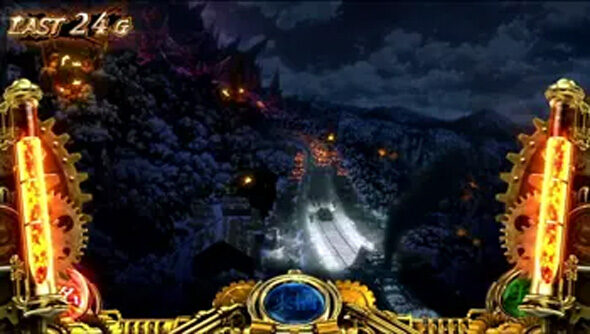 Step 3 |
Composite Chance pattern or All-Star Pattern is highly likely |
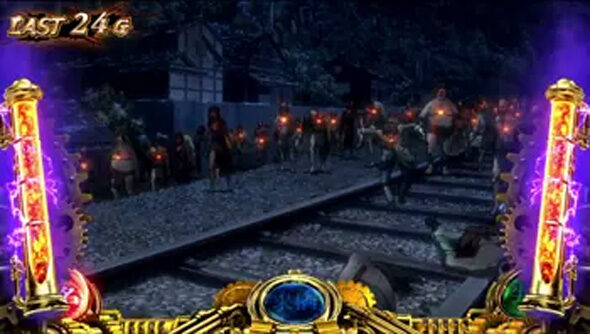 Step 4 |
Very high expectation for All-Star Pattern |
[Hidden Button]
| Hidden Button Procedure and Rules During ST | |
| Procedure | Rule |
| Press the PUSH button from Chance pattern formation until the precursor ends | A confirmed notice occurs for some Bonus wins |
| Rapidly press the PUSH button during the wait on the game where “Aim for Rokkonsyojo Pattern” occurs in a continuous effect | |
[Panel Shake Mode]
During ST, it can be set by pressing and holding the sub LCD for at least 1.5 seconds while the reels are not spinning.
(After setting, the area below the sub LCD lights red)
While set, on about 70% of Bonus-winning games, the Bonus is announced by a “pokyuun” notification sound sometime from Lever ON to the third stop.
*According to HAZUSE research.
Effect Rules (During Upper ST)
The corresponding winning combinations for each effect outside a precursor are as follows.
These rules apply when aiming for the sandwiched pattern [Blue 7 / Replay / Blue 7] on the left reel.
| Corresponding Winning Combinations by Effect | |
| Effects | Corresponding winning combination |
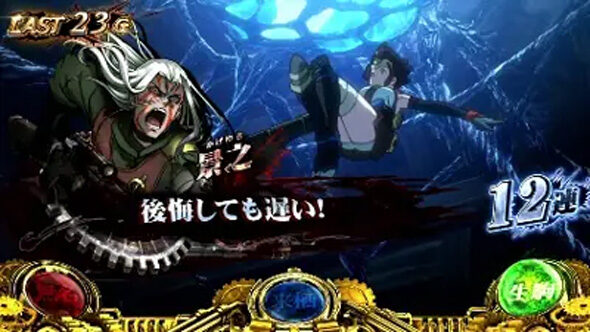 ST Conversation Effect |
blank or Chance pattern |
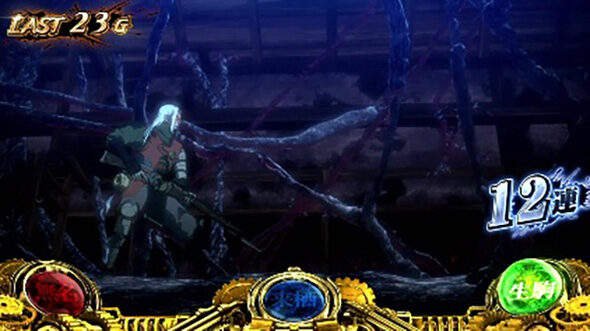 Line Effect (Kageyuki appears) |
Rising-right Bell or Chance pattern |
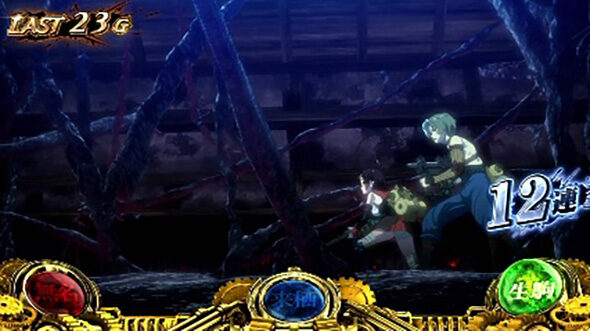 Line Effect (Ikoma and Mumei appear) |
Middle-row replay or Chance pattern |
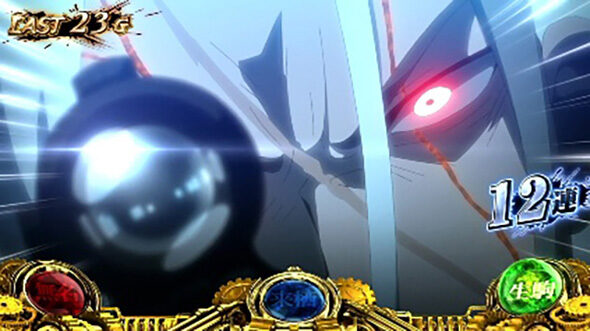 Kageyuki Gunfire Effect |
Rising-right Replay or Chance pattern |
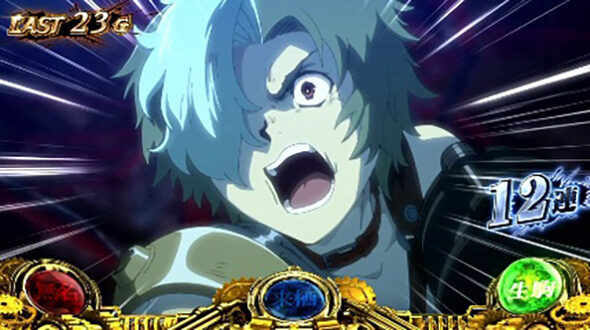 Ikoma Attack Effect |
Bottom-row Bell or Chance pattern |
*According to HAZUSE research.
Effect Rules (During Kabaneri ATTACK)
The corresponding winning combinations for each effect are as follows.
Also, when 300 medals are added in Mumei rapid-tap add-on, “Tsuranuki Add-on” has Very high expectation to occur.
| Corresponding Winning Combinations by Effect | |
| Effects | Corresponding winning combination |
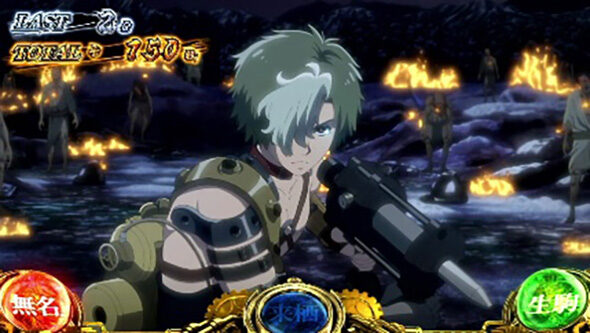 Add-on Effect (Ikoma) |
blank or Bell or Chance pattern |
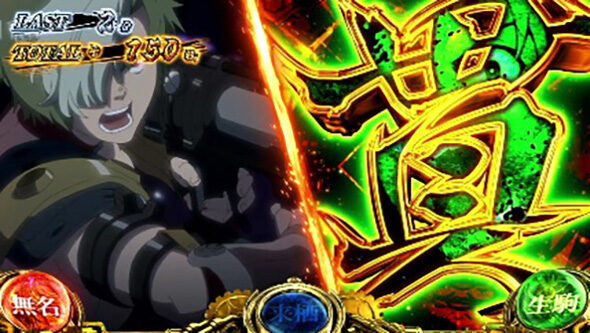 Two-Split Effect (Ikoma) |
Bell or Chance pattern |
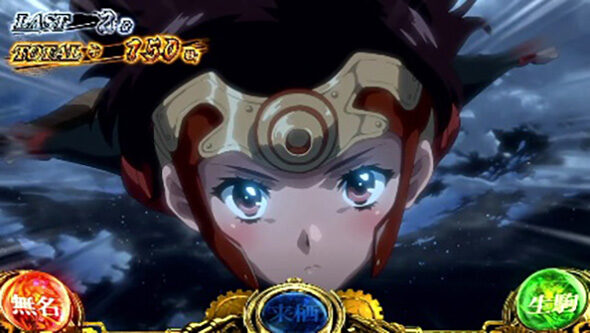 Add-on Effect (Mumei) |
blank or Replay or Chance pattern |
 Two-Split Effect (Mumei) |
Replay or Chance pattern |
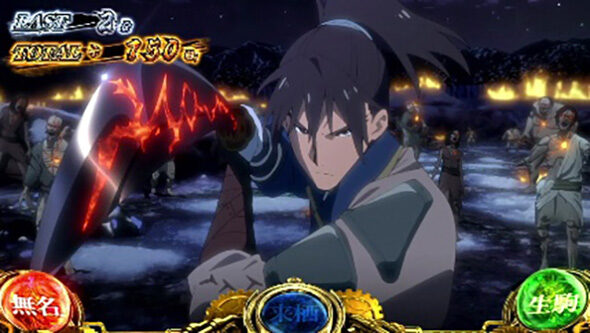 Add-on Effect (Kurusu) |
Chance pattern (Expect an add-on of 200 medals or more) |
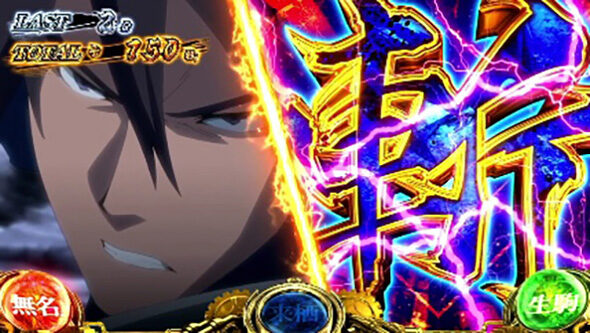 Two-Split Effect (Kurusu) |
|
*According to HAZUSE research.
About Hints on the Sub LCD
There are three sub LCD background patterns.
It may change at certain timings, and the background gives hints about the ceiling cycle.
| Sub LCD Background Pattern Hints | |
| Background pattern | Hint content |
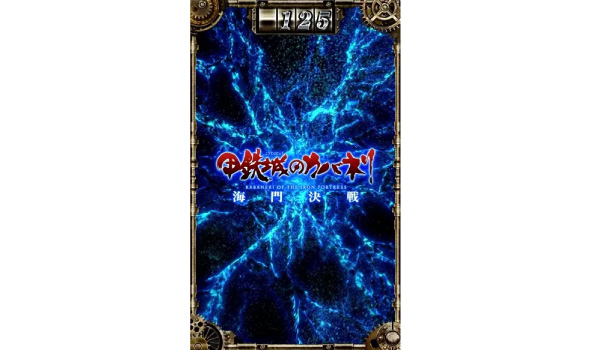 Default |
Basic pattern |
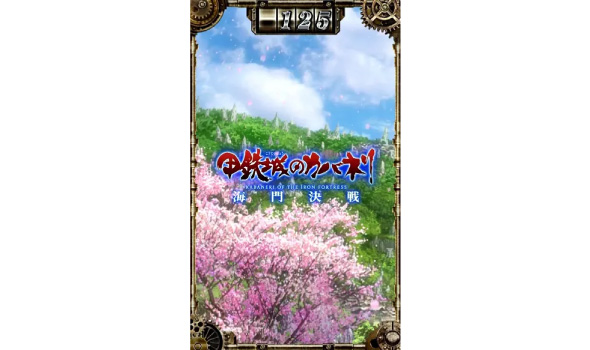 Cherry blossoms |
EPISODE BONUS win within 4 cycles is highly likely |
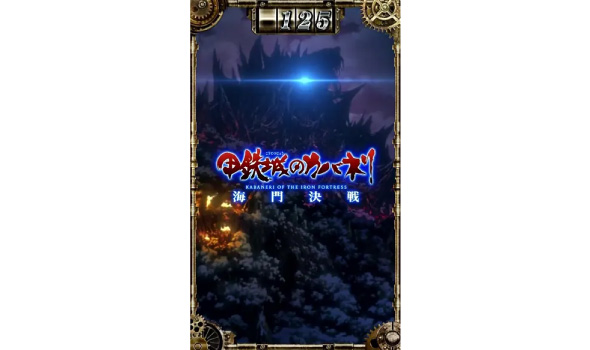 Kaimon Castle |
Ceiling is 596G + EPISODE BONUS win within 4 cycles + Kaimon Recollection are highly likely |
[While Demo Screen Is Displayed]
While the demo screen is displayed, the current cycle count and membrane level are shown on the sub LCD.
The membrane level hints at held Kabane Points, and a higher level hints that cycle arrival is closer.
| Sub LCD Demo Screen Display Hints | |
| Demo screen | Cycle-arrival likelihood |
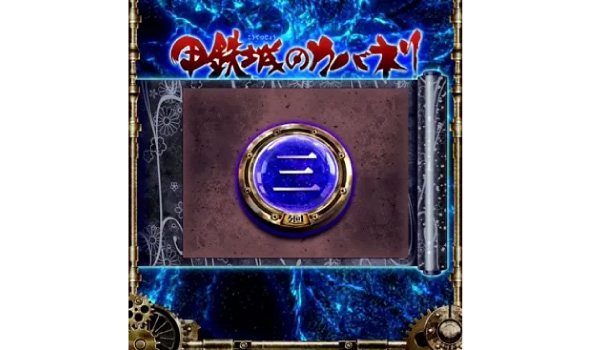 Membrane Lv.0 |
Far |
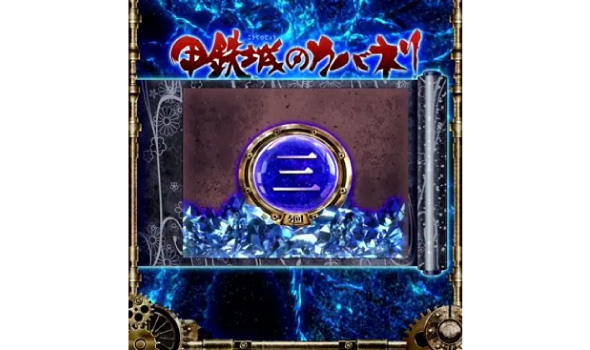 Membrane Lv.1 |
↓ |
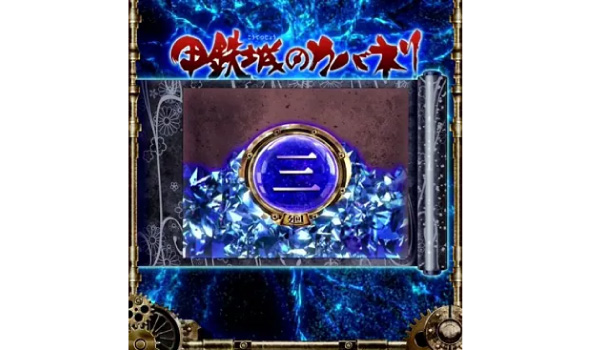 Membrane Lv.2 |
↓ |
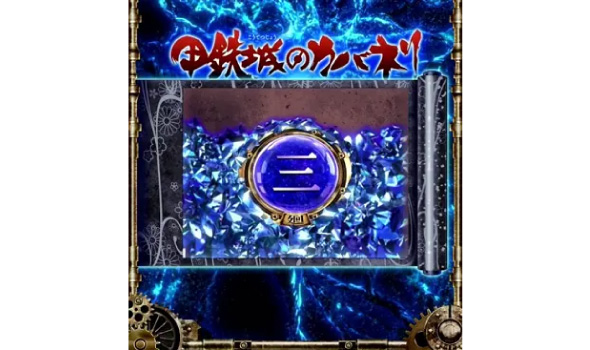 Membrane Lv.3 |
↓ |
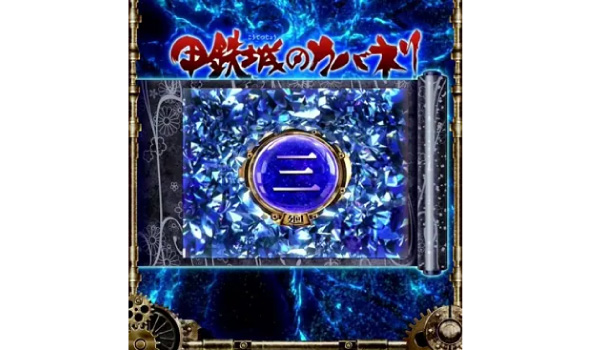 Membrane Lv.4 |
Near |
*According to HAZUSE research.
About Milestone Effects
When it occurs, the displayed character type hints at the Bonus hit likelihood for the current cycle.
Milestone Effects do not occur during continuous effects, the Fourth Section Tunnel/Strategy Meeting, or Kabane Final Defense Zone; they occur when moving to the Normal stage after those end.
| Hints by Milestone Effect | |
| Character | Bonus win likelihood for the current cycle |
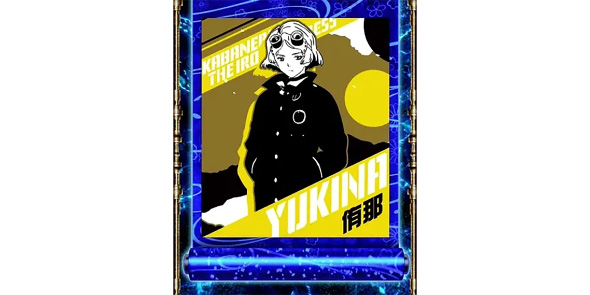 Yuna |
Basic pattern |
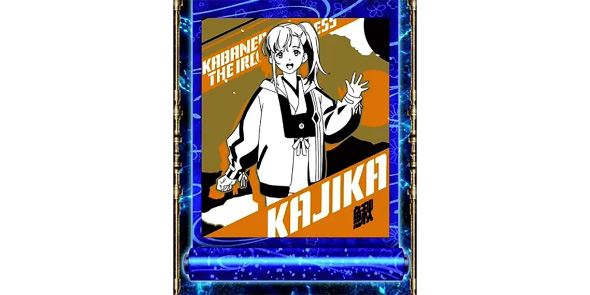 Kajika |
|
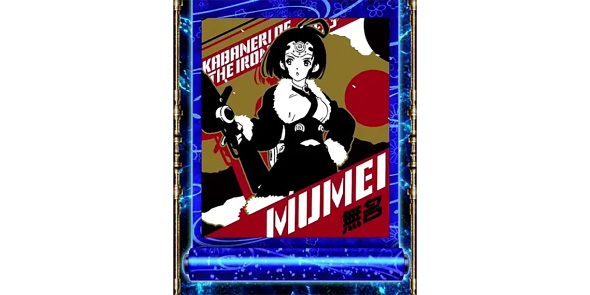 Mumei |
|
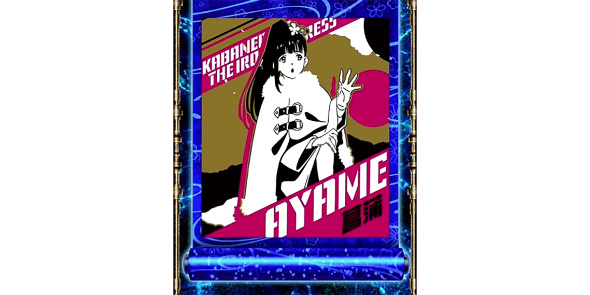 Ayame |
|
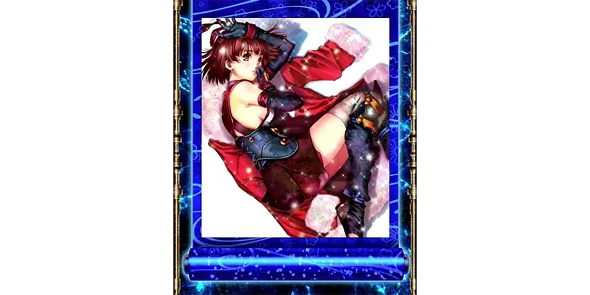 Reclining Mumei |
High expectation |
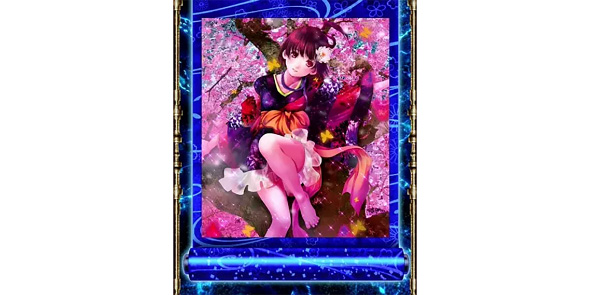 Cherry Blossom Mumei |
Very high expectation |
*According to HAZUSE research.
About Black Smoke Point Hints
![Smart Pachislot Kabaneri of the Iron Fortress: Battle of Unato [Conversation Effect]](https://hazuse.com/wp/wp-content/uploads/2026/02/5S1358-1d51db4b4a.jpg)
Conversation Effects outside a precursor give Black Smoke Point hints.
When many points are accumulated, the occurrence frequency of Conversation Effects seems to increase slightly.
| Hints by Conversation Effect | |
| Effects | Hint content |
| Miyuki | If it occurs on blank, it hints at accumulated points |
| If it occurs when Bells align, it hints at accumulated points (extreme) | |
| Miyuki → Kageyuki (white) | If it occurs on blank, it hints at accumulated points (strong) |
| If it occurs when Bells align, it hints at accumulated points (extreme) | |
| Miyuki → Kageyuki (red) | Hints at accumulated points (extreme) as soon as it occurs |
| Any character (reply does not matter) | If it occurs on Replay or when Bells align, it hints at accumulated points (extreme) |
| Any character (with reply) | If it occurs on blank, it hints at accumulated points (strong) |
[Folding Fan Effect]![Smart Pachislot Kabaneri of the Iron Fortress: Battle of Unato [Folding Fan Effect]](https://hazuse.com/wp/wp-content/uploads/2026/02/5S1358-33b81b62c4.jpg)
The Folding Fan Effect outside a precursor corresponds to Replay or Chance pattern, and if it appears on blank, it gives a Black Smoke Point hint.
| Hints by Conversation Effect | |
| Effects | Hint content |
| Folding fan (white) | If it occurs on blank, it hints at accumulated points (strong) |
| Folding fan (blue) | If it occurs on blank, it hints at accumulated points (extreme) |
[Window Step-up Effect]
In the Window Step-up Effect outside a precursor, Black Smoke Point hints are given based on the step count and Winning combination.
| Hints by Window Step-up Effect | |
| Step count | Hint content |
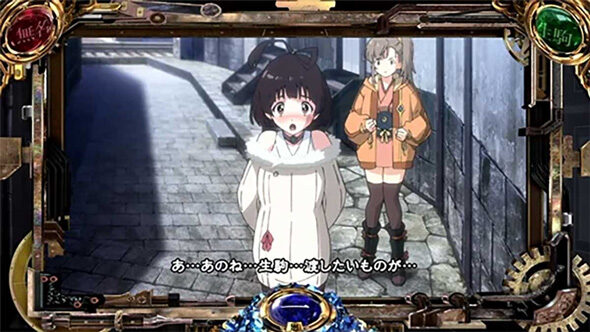 Step 1 |
If it occurs on Replay or Bell, it hints at accumulated points (strong) |
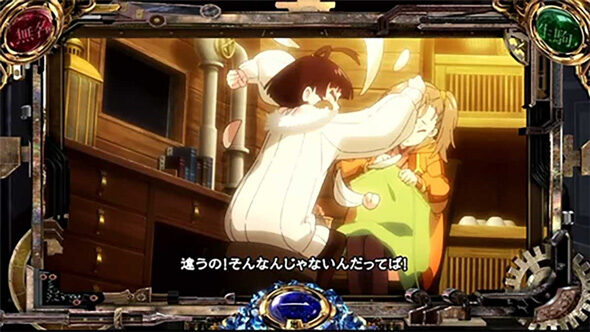 Step 2 |
If it occurs on blank, it hints at accumulated points |
| If it occurs on Replay, it hints at accumulated points (strong) | |
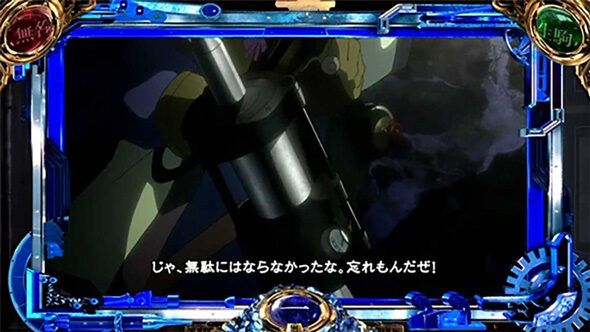 Blue window |
If it occurs when Chance pattern is denied, it hints at accumulated points (extreme) |
*According to HAZUSE research.
About Fortune Slips
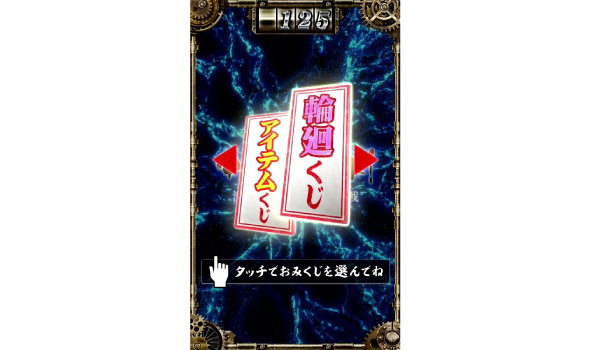
During Normal state, fortune slips may be obtained at certain timings.
For fortune slips, either “Rinne Fortune Slip” or “Item Fortune Slip” can be selected; Rinne Fortune Slip gives hints about held CZ points and cycle draws, while Item Fortune Slip gives Setting hint.
Also, Item Fortune Slip has timings when certain Setting hints are more likely to appear.
| Hints by Fortune Slip | |
| Rinne Fortune Slip | |
| Fortune slip | Hint content |
| Opportunity within the first cycle | High expectation for the 1st cycle |
| Opportunity within two cycles | High expectation for the 2nd cycle |
| Opportunity within three cycles | High expectation for the 3rd cycle |
| Opportunity within four cycles | High expectation for the 4th cycle |
| Signs in the first and second cycles | High expectation for the 1st and 2nd cycles |
| Signs in the first and third cycles | High expectation for the 1st and 3rd cycles |
| Signs in the second and third cycles | High expectation for the 2nd and 3rd cycles |
| Signs in the second and fourth cycles | High expectation for the 2nd and 4th cycles |
| Signs in the third and fourth cycles | High expectation for the 3rd and 4th cycles |
| Signs in the first, second, and third cycles | High expectation for the 1st, 2nd, and 3rd cycles |
| Signs in the first, second, and fourth cycles | High expectation for the 1st, 2nd, and 4th cycles |
| Signs in the first, third, and fourth cycles | High expectation for the 1st, 3rd, and 4th cycles |
| May Rinne bring good fortune | Bonus win in the current cycle is highly likely |
| Rokkonsyojo | EPISODE BONUS win in the current cycle is highly likely |
| Small luck: Mumei sign | Required-point arrival for Mumei Chance Pattern is closer than Ikoma Chance Pattern |
| Small luck: Ikoma sign | Required-point arrival for Ikoma Chance Pattern is closer than Mumei Chance Pattern |
| Middle luck: Mumei close | Required-point arrival for Mumei Chance Pattern is closer than Ikoma Chance Pattern + only a little remains until required-point arrival for Mumei Chance Pattern |
| Middle luck: Ikoma close | Required-point arrival for Ikoma Chance Pattern is closer than Mumei Chance Pattern + only a little remains until required-point arrival for Ikoma Chance Pattern |
| Item Fortune Slip | |
| Fortune slip | Hint content |
| Tsuranuki Tube | Less likely to appear on Setting 4 |
| Mumei’s pistol | Less likely to appear on Setting 3 |
| Suicide bag | Less likely to appear on Setting 1 |
| Kurusu’s sword | Denies certain settings |
| Mumei’s kendama | |
| Ayame’s bow | High-setting hint (weak) |
| Miyama Karasu-ageha | High-setting hint (strong) |
| Small luck: Play with peace of mind | Setting 2 or higher is highly likely |
| Middle luck: Good news; no need to hesitate | Setting 4 or higher is highly likely |
| Great luck: The best fortune will arrive | Setting 6 is highly likely |
| Item Fortune Slip Timings when certain Setting hints are more likely to appear |
| ·From morning opening through the 5th fortune slip |
| ·Fortune slips on multiples of 5 |
| Appearance Trend for Item Fortune Slip “Small luck” | |
| Count | Trend |
| 1st time | More likely to appear on Setting 6 |
| 2nd time | More likely to appear on Setting 2 or 6 |
| 3rd time | More likely to appear on Setting 3 or 6 |
| 4th time | More likely to appear on Setting 4 or 6 |
| 5th time | More likely to appear on Setting 5 or 6 |
*According to HAZUSE research.
About Rapid-Tap Add-ons During Kabaneri ATTACK
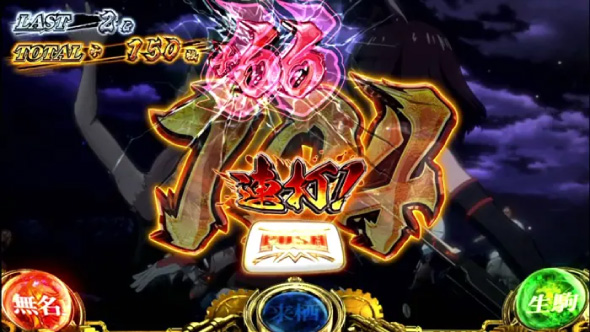
During Kabaneri ATTACK, rapid-tap add-ons may occur.
When certain number-of-medals-added displays occur, Setting hint is given.
| Hints from Specific Number of Medals Added Displays | |
| Number of medals added | Hint content |
| +44 | Setting 4 or higher is highly likely |
| +55 | Setting 5 or higher is highly likely |
| +66 | Setting 6 is highly likely |
| +77 | Setting 6 is highly likely |
*According to HAZUSE research.
About Hints During Kabaneri BONUS
![Smart Pachislot Kabaneri of the Iron Fortress: Battle of Unato [Character Introduction]](https://hazuse.com/wp/wp-content/uploads/2026/02/5S1358-c162cb73c2.jpg)
During Kabaneri BONUS, character introductions occur.
Setting hints are given according to the type of character that appears.
The appearance rate of “Biba” changes according to the total number of games played that day.
| Hints by Character Introduction | |
| Character | Hint content |
| Male characters | Setting 3 or 5 hint |
| Female characters | Even-setting hint |
| Biba | Setting 4 or higher is highly likely |
| Character Introduction Allocation | |||
| After 1–5000G played | |||
| setting | Male characters | Female characters | Biba |
| Setting 1 | 50.00% | 50.00% | – |
| Setting 2 | 42.50% | 57.50% | – |
| Setting 3 | 58.50% | 41.50% | – |
| Setting 4 | 41.40% | 58.50% | 0.10% |
| Setting 5 | 60.00% | 39.90% | 0.10% |
| Setting 6 | 39.85% | 60.00% | 0.15% |
| After 5001–7000G played | |||
| setting | Male characters | Female characters | Biba |
| Setting 1 | 50.00% | 50.00% | – |
| Setting 2 | 42.50% | 57.50% | – |
| Setting 3 | 58.50% | 41.50% | – |
| Setting 4 | 39.50% | 58.50% | 2.00% |
| Setting 5 | 60.00% | 38.00% | 2.00% |
| Setting 6 | 37.00% | 60.00% | 3.00% |
| After 7001–8000G played | |||
| setting | Male characters | Female characters | Biba |
| Setting 1 | 50.00% | 50.00% | – |
| Setting 2 | 42.50% | 57.50% | – |
| Setting 3 | 58.50% | 41.50% | – |
| Setting 4 | 31.50% | 58.50% | 10.00% |
| Setting 5 | 60.00% | 30.00% | 10.00% |
| Setting 6 | 25.00% | 60.00% | 15.00% |
| After 8001G or more played | |||
| setting | Male characters | Female characters | Biba |
| Setting 1 | 50.00% | 50.00% | – |
| Setting 2 | 42.50% | 57.50% | – |
| Setting 3 | 58.50% | 41.50% | – |
| Setting 4 | 41.40% | 58.50% | 0.10% |
| Setting 5 | 60.00% | 39.90% | 0.10% |
| Setting 6 | 39.85% | 60.00% | 0.15% |
[Voice on Successful Reverse-Stop Cut-in]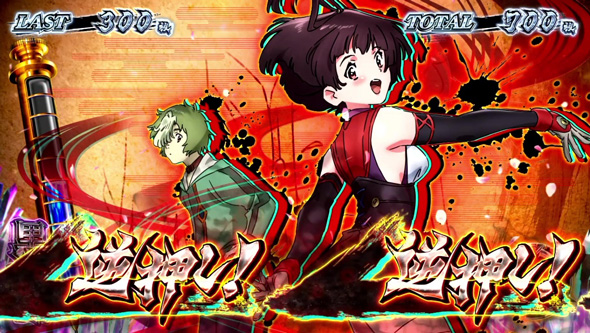
When a reverse-stop cut-in occurs during Kabaneri BONUS, challenge the technical intervention.
On success, the Black Blood Plasma meter accumulates and a voice occurs; Setting hints are given according to the voice type.
(Lamps around the sub LCD light in sync with the voice)
After success, the voice can be played again by pressing the PUSH button or touching the sub LCD until the next game’s Lever ON.
| Hints by Voice on Successful Reverse-Stop Cut-in | |
| Voice | Hint content |
| Male characters other than Kageyuki | Setting 3 or 5 hint |
| Female characters | Even-setting hint |
| Kageyuki: “Why didn’t you tell me I was human!!” | High-setting hint (weak) |
| Kageyuki: “Am I… human, or Kabane!?” | High-setting hint (medium) |
| Kageyuki: “Maybe this is the last one this year.” | High-setting hint (strong) |
| Mumei: “This machine really isn’t normal…” | Setting 2 or higher is highly likely |
| No voice | Setting 5 or higher is highly likely |
| Lamps around the sub LCD | |
| Lamp color | Corresponding voice |
| Lower lamp lights up | Male characters other than Kageyuki |
| Upper lamp lights up | Female characters |
| Upper and lower lamps light up | Kageyuki (one of the three types) |
| Upper/lower lamps + strobe lamp light up | Mumei: “This machine really isn’t normal…” |
| Does not light up | No voice |
*According to HAZUSE research.
About Number of Medals Won Displays
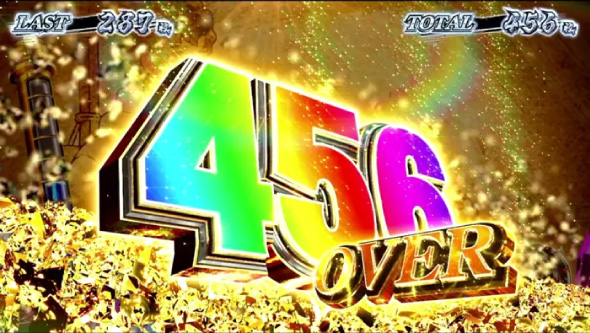
In AT, a medal-count display may occur when a certain number of medals has been won.
When certain medal-count displays occur, Setting hint is given.
| Hints from Specific Number of Medals Won Displays | |
| Medal-count display | Hint content |
| 456OVER | Setting 4 or higher is highly likely |
| 666OVER | Setting 6 is highly likely |
*According to HAZUSE research.
About ST End Screens
Setting hints are given according to the screen type.
The appearance rate of “Mumei & Ayame” changes according to the total number of games played that day.
| ST End Screen Hints | |
| End screen | Hint content |
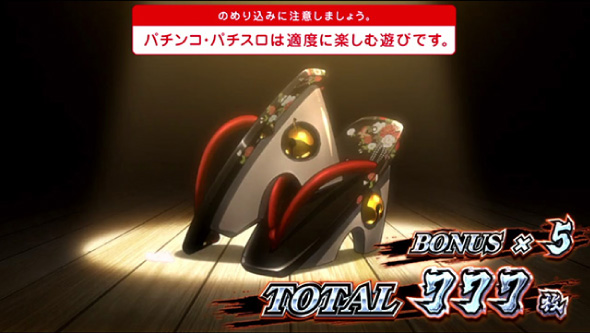 Iron geta |
Basic pattern |
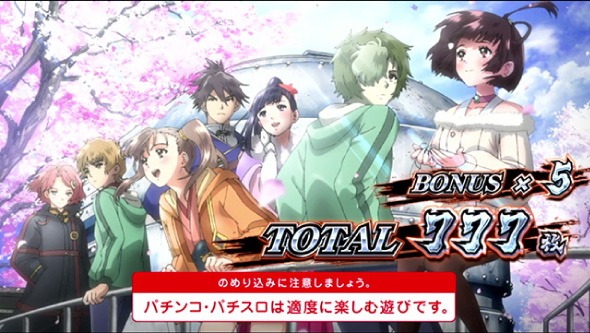 Kotetsujo characters |
High setting hint |
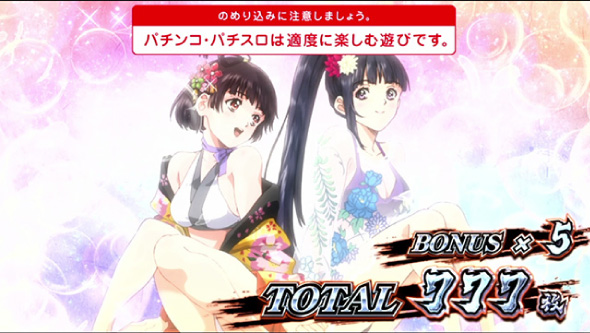 Mumei & Ayame |
Setting 6 is highly likely |
| Conditions for increased appearance rate of “Mumei & Ayame” |
| ·Appearance rate increases between 5001G and 7000G |
| ·Appearance rate greatly increases between 7001G and 8000G |
*According to HAZUSE research.
About Sammy Trophy
Setting hints are given according to the Sammy Trophy type.
| Sammy Trophy Hints | |
| Trophy | Hint content |
| Bronze | Setting 2 or higher is highly likely |
| Silver | Setting 3 or higher is highly likely |
| Gold | Setting 4 or higher is highly likely |
| Kirin | Setting 5 or higher is highly likely |
| Rainbow | Setting 6 is highly likely |
| Sammy Trophy Appearance Rate | |||
| After 1–1000G played | |||
| setting | Bronze | Silver | Gold |
| Setting 1 | – | – | – |
| Setting 2 | 0.10% | – | – |
| Setting 3 | 0.20% | 0.05% | – |
| Setting 4 | 0.40% | 0.06% | 0.04% |
| Setting 5 | 0.60% | 0.08% | 0.06% |
| Setting 6 | 0.80% | 0.10% | 0.08% |
| setting | Kirin | Rainbow |
| Setting 1 | – | – |
| Setting 2 | – | – |
| Setting 3 | – | – |
| Setting 4 | – | – |
| Setting 5 | 0.02% | – |
| Setting 6 | 0.03% | 0.02% |
| After 1001–5000G played | |||
| setting | Bronze | Silver | Gold |
| Setting 1 | – | – | – |
| Setting 2 | 0.08% | – | – |
| Setting 3 | 0.15% | 0.04% | – |
| Setting 4 | 0.20% | 0.05% | 0.02% |
| Setting 5 | 0.40% | 0.06% | 0.03% |
| Setting 6 | 0.50% | 0.08% | 0.04% |
| setting | Kirin | Rainbow |
| Setting 1 | – | – |
| Setting 2 | – | – |
| Setting 3 | – | – |
| Setting 4 | – | – |
| Setting 5 | 0.01% | – |
| Setting 6 | 0.02% | 0.01% |
| After 5001–7000G played | |||
| setting | Bronze | Silver | Gold |
| Setting 1 | – | – | – |
| Setting 2 | 0.15% | – | – |
| Setting 3 | 0.15% | 0.15% | – |
| Setting 4 | 0.15% | 0.15% | 0.50% |
| Setting 5 | 0.15% | 0.15% | 0.50% |
| Setting 6 | 0.15% | 0.15% | 0.50% |
| setting | Kirin | Rainbow |
| Setting 1 | – | – |
| Setting 2 | – | – |
| Setting 3 | – | – |
| Setting 4 | – | – |
| Setting 5 | 0.50% | – |
| Setting 6 | 0.50% | 0.50% |
| After 7001–8000G played | |||
| setting | Bronze | Silver | Gold |
| Setting 1 | – | – | – |
| Setting 2 | 0.20% | – | – |
| Setting 3 | 0.10% | 0.25% | – |
| Setting 4 | 0.10% | 0.10% | 0.70% |
| Setting 5 | 0.10% | 0.10% | 0.20% |
| Setting 6 | 0.10% | 0.10% | 0.20% |
| setting | Kirin | Rainbow |
| Setting 1 | – | – |
| Setting 2 | – | – |
| Setting 3 | – | – |
| Setting 4 | – | – |
| Setting 5 | 1.00% | – |
| Setting 6 | 0.40% | 1.00% |
| After 8001G or more played | |||
| setting | Bronze | Silver | Gold |
| Setting 1 | – | – | – |
| Setting 2 | 0.10% | – | – |
| Setting 3 | 0.20% | 0.05% | – |
| Setting 4 | 0.40% | 0.06% | 0.04% |
| Setting 5 | 0.60% | 0.08% | 0.06% |
| Setting 6 | 0.80% | 0.10% | 0.08% |
| setting | Kirin | Rainbow |
| Setting 1 | – | – |
| Setting 2 | – | – |
| Setting 3 | – | – |
| Setting 4 | – | – |
| Setting 5 | 0.02% | – |
| Setting 6 | 0.03% | 0.02% |
*According to HAZUSE research.


